I was called at the town office by the Clay factory manager mid day Friday. She handed the phone to Dickson, the mason building the large groin ed vault.
"Can you come by as there is a crack !, there is no immediate danger but serious." It was hard to understand from his explanation.
My immediate thoughts while I am riding my bicycle to the factory:
- I have to scrap this whole idea and make a boring roof like my neighbor.
-It is just too complicated.
-I envision it will have all fallen down by the time I get there.
-I am now waiting for "I told you so, this wont work"
-I am way out of my level.
Arriving, from outside on the ground it all looks normal......
What I see when I go up the stairs to the first floor is a separation of arches on two vaults. three arches have split apart on two of the vaults

In one groin corner at the bottom there are some cracks in the groin bricks .
 And from the other side.
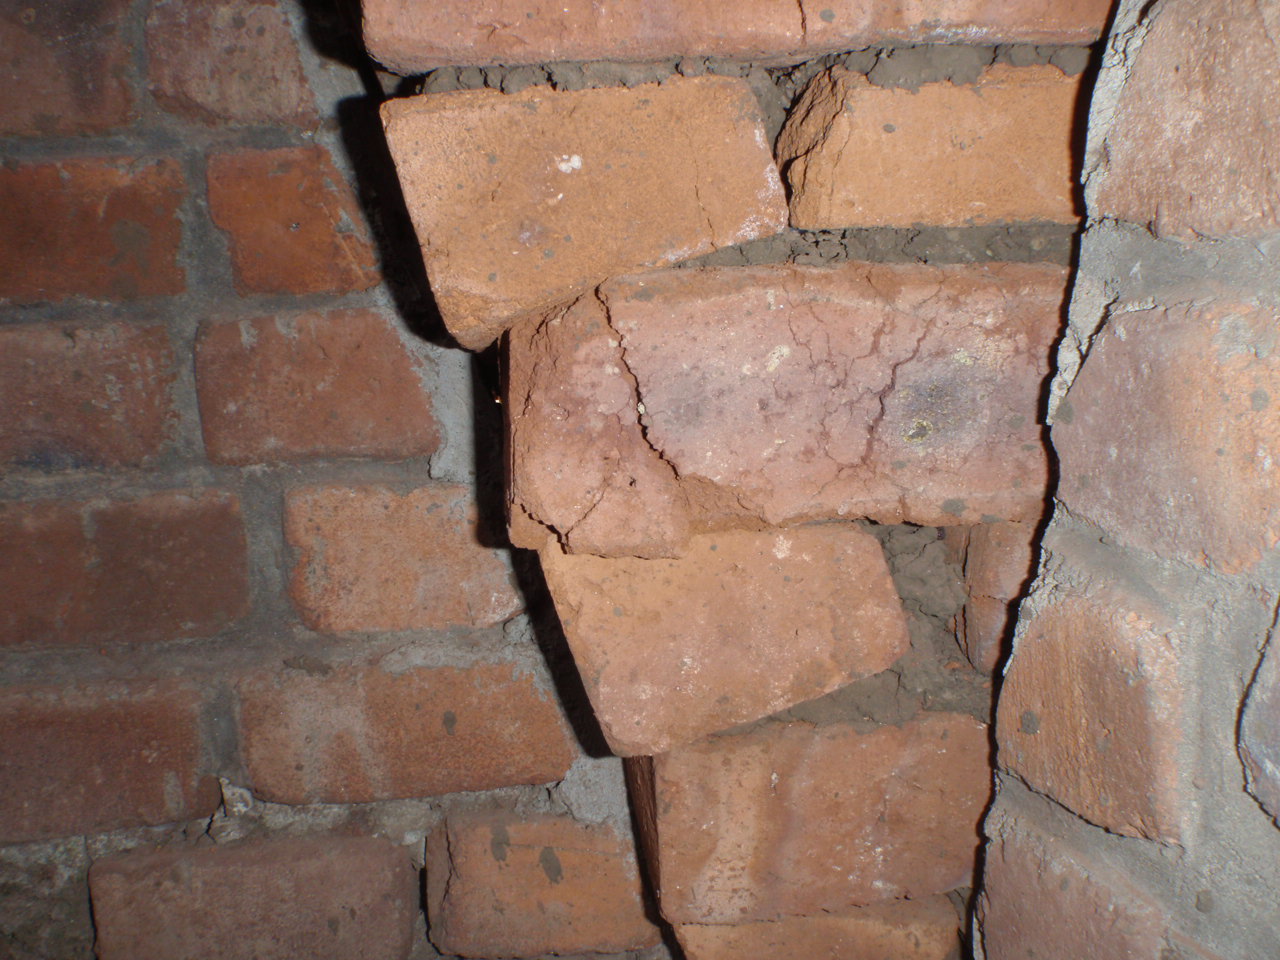 The stretcher third row from bottom shows a brick that must of failed and sank, then ones above cracked.
My immediate thought is "Is it going to fall right now?
Why?
I have learned a lot in the past few hours and will learn more in the next week. In summary, a groin ed vault is not as forgiving a vault, and you better make very sure that the groin pieces are touching completely on the next piece. In the end it is good it happened now, and what we learned is big. Yes it is true, we don't know what we are doing, but we are "finding a lost art" reinventing the wheel. I could find no real detail on how to cut the groin bricks. Hopefully what I learn can be used by others.
I inspected and inspected and we made several mistakes .
1-The arches separated because one brick failed in a groin, when it failed the bricks above and below also failed / cracked.
2-This groin (below) was the first one we built. By the third corner were doing it in a good way. I am embarrassed by below picture, but it needs to be shown. We didn't know what we were doing, had no idea how to do it. I should of tore it down, except it taught us a lot. We should of torn it down, as we had been experimenting.

3- In my planning I thought we needed a non standard brick 10cm thick instead of 7cm. My thinking was as it would be cut it could become weaker. The problem as it was a non standard brick it was made differently and not burnt as well. they were weaker bricks than the thinner ones because not made by slop method but rammed in a press and not burnt well. visual inspection shows it has more cracks in it than a normal brick.
4- The brick was cut top and bottom trying to get them to overlap. it should of been only cut on the top. (by the second corner we had stopped that.)
5- Not all bricks lay perfectly flat on the brick below, so there was a pressure point and it snapped the brick. It is really important that the load bearing part of brick is touching the whole length or width.
6- the bricks in the groin in the bottom 2 meters should be over burnt (stronger)
The groin pieces in the lower third have to:
-be clinkers in the corner
-and cut precisely
-lye completely flat on mortar
-extend out past the groin
-no sharp edges of bricks resting on a brick. flat against flat.
After some hours I am able to say, it is a good lesson, we learned a lot, but pay more attention to what is going to happen in the groin.
Loading now with the rest of the bricks, I have put enough bricks on the top to simulate the weight of the remaining bricks that need to be placed. I want to see what happens. (note: it had no problems in the good groins.)
In the end it makes me respect the arch even more. It holds up even when there was a failure.
What follows is too many pictures but I post for historical reasons (Inevitably my hard drive will crash and the back up hard drive before i make another backup)
Eventually it was better:
 Here we tried cutting each at a 45 degree angle, and then again sloping at same angle as the other. this meant cutting two bricks each groin, and the bricks became quite small, and no overlapping bond. You see in the last 6 courses we went to cutting one brick only, the other is completely whole, and there is an overlapping bond now.
More pictures of the failure, this from outside


Sooooo, what did you do? Did you tear the groin down? I looked at later photos and couldn't tell. The house looks quite amazing. I'd like to live in it. What will you put in the small square hole in the very top?
ReplyDeleteTore it down as you see in later posts and started all over again. Finished in late October, working on pointing and finishing.
ReplyDeleteYou got a fan here. What happened today is what make your post so interesting to me. It is fascinating the problems that you are trying to solve. I'm from Chile and I'm studying Arch in the US, and today I realize I don't know anything hahaha, please keep up the good work and more important (to me) keep up the post!
ReplyDeleteGreetings from Tucson, Arizona
Camilo, As I get older I realize I don't know all that much. As a arch student please give some input.
ReplyDelete