Tuesday, December 8, 2015

Rammed earth progress

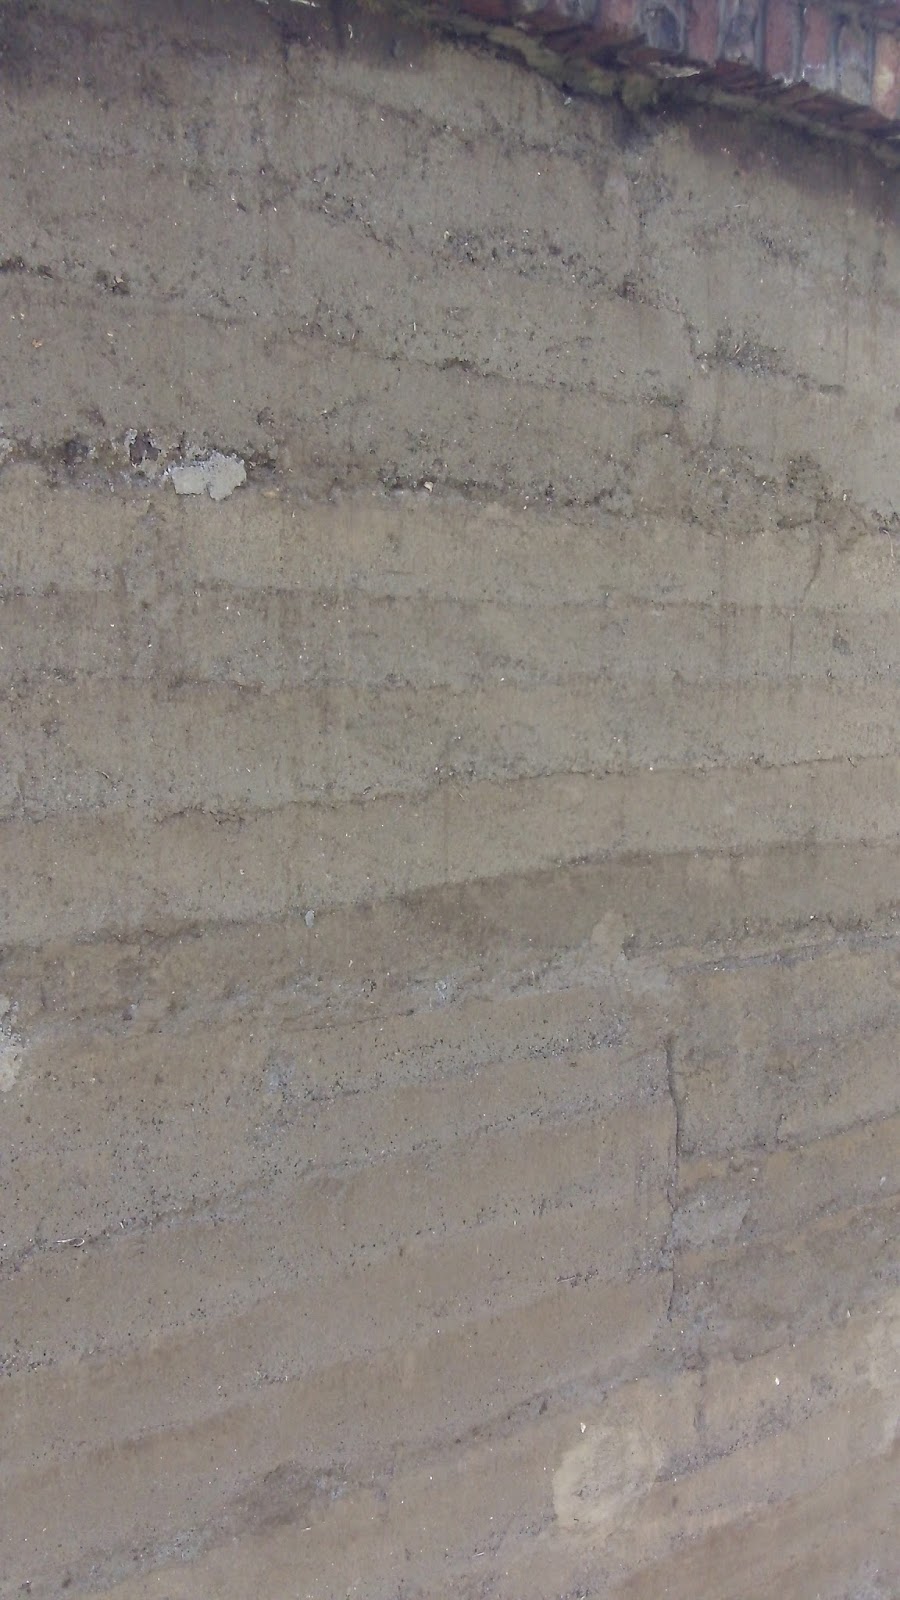
Up to the lintel on first rammed earth building.  


After building maybe 200m(2) of garden walls we are working on this small garage.  some things learned:
-the mixture should be dry as possible.
-lime combines better with clay than cement
-it is possible to do soil-sand.  only do first line with lime
-form work should overlap more on bottom, makes easier to go up straight.
-cut pipe for putting bolt thought exactly width of desired form work and pound them out immediately.
-last layer put in lime again for water proofing.
-maybe there should not be staggered joints as it will crack through sometimes, at least he crack would follow the joint.
-keep checking vertical as you ram
-after removing form work it takes a day or two to become very hard.
-marine board means it will stick a bit, real wood is better, but leaves design.


Tuesday, October 20, 2015

Vaulted Roof for Kiln, with chimney

Roofing over the kiln has always been an issue.  Corrugated Iron only lasts 8 months due to the wood smoke.  cement tiles deteriorated after a few years.  Lumber with asphalt felt the felt deteriorates from sun.  For ten years i have the asphalt over the wood and replace.  that is expensive and am using old greenhouse plastic.

Now i have another problem.  ten years ago we used only wood for burning.  For reasons of cost, cutting trees, and variability we experimented ( costly)  and ended up putting charcoal dust on every layer.  It works very well and is cheap.  I still needed some firewood to get it going.  Then i found jatropha cake, the "waste" after extracting biofuel.  Someone make briquettes and we can throw them into the kiln tunnels, so we decreased firewood again.  We also used some jatropha briquettes in the lower layers to help the fire move up to t he charcoal dust.

It works good.  New problem.  Jatropha cake has a fair amount of oil left in it and the smoke is not bearable like wood and charcoal dust.  Can't work in the drying sheds above the kiln those two-three days when we burn.  Neighbor house is complaining.

Enter the idea to vault the kiln and add a chimney.  I have no idea how to size the chimney.  What i can find is complicated calculations.

Front and chimney side of kiln.  on left bottom you can see part of one of the six tunnels for lighting fire.


Doors on the sides for loading and unloading.  They are bricked up before firing.  upper door is for monitoring the progress and also loading / unloading.

above lower door is chimney.  WE will see

Tried new method of layout of the catenary arch.  Hung chain and then measured every 20cm and transferred the measurements to end walls.


One end got about 2m out and then heavy truck caused many vibrations from road and one arch opened up 3mm.  if it was closed would not be a problem.
Solution below is to put another layer immediately on top.


Second layer goes up fast.  again clay mud mortar


The end without chimney.  Will need to build stairs to upper door.

 Inside looking at the chimney flue .  It is temporarily bricked in

the arches.  it will become black soot some day.


I need to show the butresses.  there is a ring beam.  a bit worried about heat on the cement so am plastering the ring beam with a soil sawdust insulation.

Tuesday, September 22, 2015

Rammed Earth not that much cheaper

I finished the rammed earth garden wall on the backside of my house compound.  I need to put a cap on.

We learned some and are learning more.

1- if mixture is too moist it sticks to the forms when removing.  it is barely wet.

2- the ramming is not with much force by about 4 passes.

3- the wall are hard

So we started on the walls for a garage/ grain store.  I am using two neighbor teenagers who have no training.  I pay 10,000 shs per formwork which is about 1m2 of wall.  40cm thick

I had a visitor architect and we went through the pricing and it only decreases cost of wall about 30% when both cement block and rammed earth are unfinished.  I thought it would be more than that.

I could decrease the width of the wall to 30 cm and maybe save 25%


Friday, July 17, 2015

Trials finishing rammed earth walls


Looking at different finishes.


Soil - sand 5-3 done immediately.  almost no cracking


Nothing done to wall


pipes in wall for placing supports later

My neighbors ugly wall.  Including efflorescence being seen on bottom.


Stones rammed along formwork.

bricks rammed along formwork


soil - sand  5-3


No finish but marble dust in the rammed earth


Soil-sand  3-5


soil-sand  1-1  Not good, add more sand!

Can't remember where this was taken.


 Next two pics gypsum plaster over the rammed earth.


Plaster Cement-soil-sand  2-2-1


More Rammed earth progress

Some completed walls before finishing.


Tuesday, July 14, 2015

Back on track (for awhile)


I started building vaults to lower building costs.  After a couple I got carried away with making vaults fancier and more complicated (groined vaults) and hence more expensive.

So for the past year (s) I have been dreaming how to make walls cheaper and decided i would try stone walls and rammed earth walls.

I need to fill in space where old gate was.  I buy this stone for $55 per 5m(3) delivered.  It is very hard and cuts badly but has a naturally mostly flat surfaces.  I chose to build with cement/lime/sand mortar.  We get a fair amount of positive comments.


I was thinking i better use cement as my neighbors all use it.  Notice the mansion over the wall.

so on the other side of the gate along a garden I used claysoil/sand mortar.


I will eventually put a roof cap over the wall to keep the wall  drier.

It looks good and is strong but it still is not "inexpensive"

for some years I have been reading about cob, rammed earth, and bagged earth.  I chose to go with rammed earth and I think the choice is right for me.  All i need to supply is sand.  Soil i get from the foundation and quarrying on our land.

the forms.
Make them strong.  the pressure is great.

I used marine plywood, ripped in half.
 Then 4x2 down  the lenght.
then another 3 4x2 upright and bolt holes through them.

Finished looks like this:

I builg a stone foundation, 5cm of cement plaster and then plastic sheeting.

I enlist neighbor boys.


Ramming 10cm to 3cm repeatedly to fill the 50 cm


Some places the rammed soil sticks to the formwork.


Imperfections, and different sand types


locking joint


Tried some decorations


Tried embedding stones and bricks and bottles


Starting to try smooth earth finishing, next tadelakt?